| Materials/ PART 3 - Scope mapping |
|
PART 3 - Scope mapping We have created a very basic pot with a simple cylindrical texture applied. We will continue fine tuning our material here and also map on a "leaf" to the pot that shows some of the power of VSL. Load "tutorprojects/material/pot/Pot_Part2.r3d". This scene has some lights and a ground applied to show off our pot better.
Let's continue to tweak our material and give the pot a few more realistic attributes. Go to the Materials tab in the select window and select our "Pot" material. Double click the material if the Property window is not already up. Let's use another wizard and add some "Ping" to our pot, using the "Specular Color" wizard - Add it too. Try rendering the view to see the difference. It renders as if it is made from gold. We want a more subtle appearance - so change the specular values to read:
We could go on to add bump and a bit of reflection if we wanted - but let's get started on a new material to map a "leaf" onto the pot. Create a new material - right click in select material window and select New/VSL material. Rename the material "Leaf". (We can do this by changing the name in the Property window, too.) We have two "modes" when creating materials - Basic and Advanced. We are currently looking at the Basic mode in our property window. If we tick the "Advanced" button at the top left we can see exactly whats going on in this material. Let's do this.
Use another Wizard and create a "Texture Map". This creates a new surface property that is assigned to a texture. This texture is, by default, assigned to the color channel of an object. But we want it to be assigned to the "Scope" attribute in this case. The scope channel controls how much of a material is shown and how much is not. This is a powerful function that allows us to put any image onto an already mapped object (or unmapped) and clip out any undesirable background so we have only the desired portion shown on the image. This has applications in assigning text over a material and removing the background so we only see the text. Assigning a complex window bitmap over a brick mapped wall, mapping a logo to a product, etc. We "Cut" our image out to do this - generally with an alpha channel (Extra information in an image that stores "transparency" data - typically Targa files are saved with an Alpha channel). We could also use a specific color value to do the same effect - but we have a Targa file with an alpha channel already setup. Select our new texture map icon that has been placed in the properties window (red paintbrush icon). At the bottom of our properties window we see a file requester window similar to the basic version we used previously. Select the texture "tutorprojects/material/pot/textures/D_potleaf+A2.tga" by pressing the "..." button. If we were to map this texture onto our pot now, it would overwrite the material we created previously, so we need to setup our "Scope" value so only where the leaf texture is shall be mapped onto our pot. Right click on the color=texture icon and select Copy, then Paste. This creates a duplicate of the texture we just assigned. Select the first texture map. Right click and under "Output >" select "surface : scope." This changes the output from the texture map to go to the scope instead of the color. And that is the basic structure of our scope material. Let's assign this to our pot and see what all this complicated VSL does. Go back to the select window. Click the FRONT view and make our pot full screen (drag the mesh to the screen) Make sure that the pot LEVEL itself is selected and not the mesh as the material mapping will be put inside this level. Go to the material tab again and select our "Leaf" material.
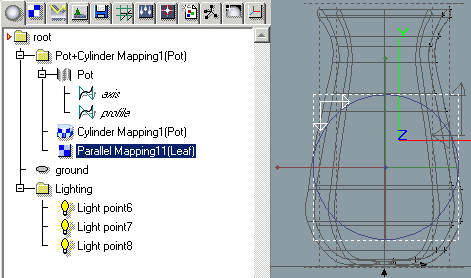
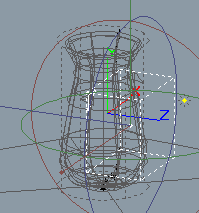
Right click on the material and select Map/Parallel. Draw a rectangle roughly square - starting click at the top left and 2nd click bottom right. The map object is now inserted under our level as shown above. We can select the mapping object and scale/reposition it as necessary. Rendering the view should yield a result similar to this:
Make a few test renders around the object. Notice that we can move the leaf map around the object and it covers whatever is under it. But there is one small problem. The leaf appears on both sides of the pot! It is by default, mapped straight through and will continue going on forever. If we set the tile X + Y buttons on, it would repeat over the object as well. In this case, we only want 1 copy of the leaf, so we will set some attributes under the mapping object: Select parallelmapping(leaf). Under the "Spec" tab in the properties window are three toggles - select them all ON - "Finite X,Y,Z".
This limits the extent of our leaf material to within the boundaries of our mapping object. This is a very handy feature! Modify our parallel mapping object so it sits within one side of our pot and looks similar to this:
Finally, let's add a bump map to our material to give it a realistic "raised brushstroke" feel. Go to the material tab in the select window. Select the leaf material and open the properties window. Using a wizard, add a bump map. In the name field, select the "B_potleaf+A2.jpg". Under the Bump Height field, enter "-1". Render your pot. Notice that all these materials have very subtle effects. To see what any of the parameters do - increase the values. (e.g. change the bump height to -5.) To finish off our scene - let's change some of the values of the "Ground" object without assigning a material to it. Go to the select window and select the Ground object. Under the "Col" tab of the properties window are various surface properties that we can change without the need to assign a material to. (A material would override these settings.)
Right click on the white square. Only one option appears: "Expand". Click this. This brings up our color wheel. Select any color you like. Next to Attribute, Select the "Reflection" attribute. This uses a greyscale value to say how "Reflective" an object is. Black is none, white is mirror. Select a dark grey. Your final scene should look like this.
|
|
|
|


